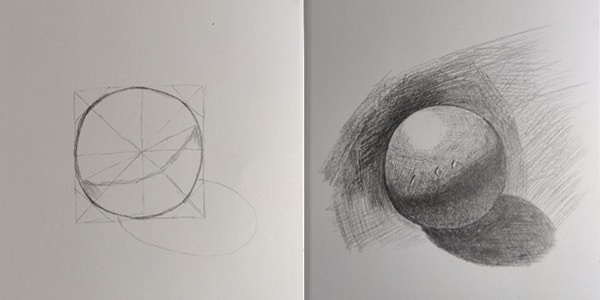
Have you ever tried to draw a sphere as a beginner? Is it tricky? Spheres don’t have the same multifaceted structure as cubes, so we don’t have a way to draw them in point perspective.
We can only use shading relationships to represent a three-dimensional sphere. Today we will practice drawing a sphere step by step. If you are also a beginner you can follow us and try it out.
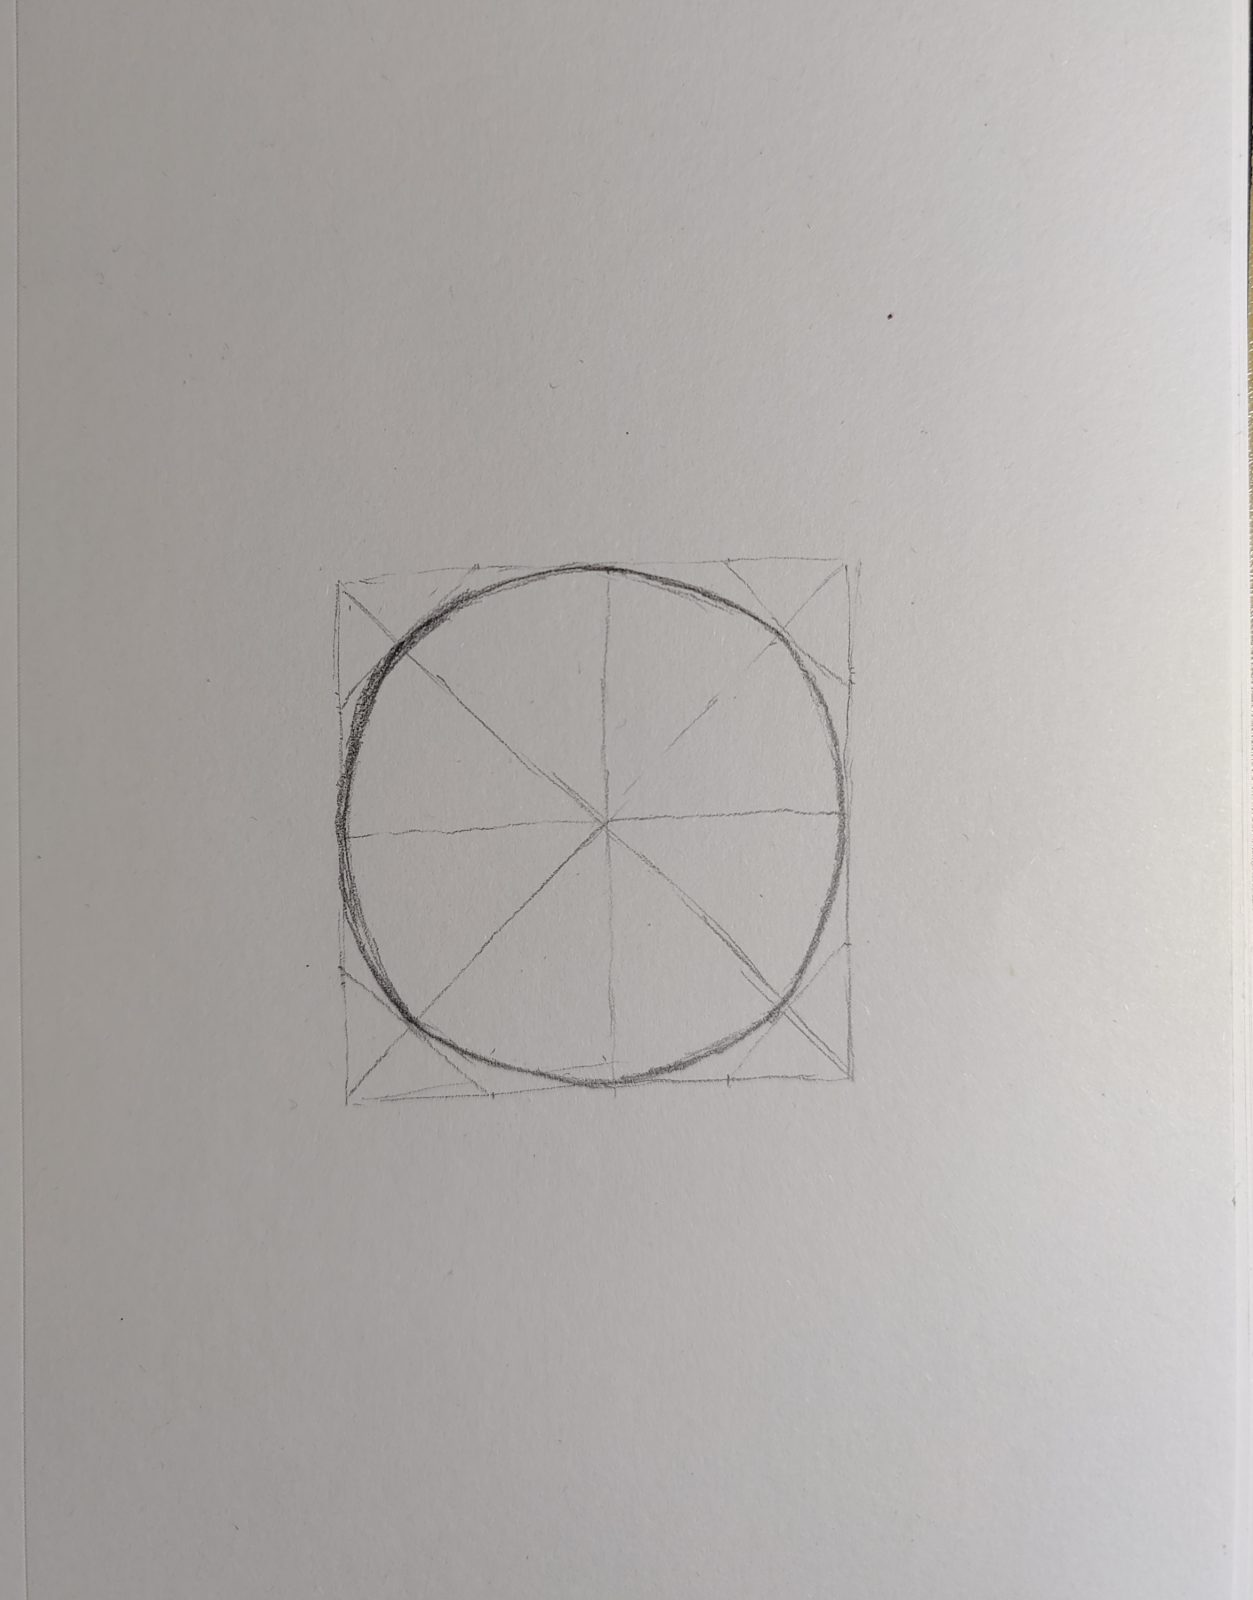
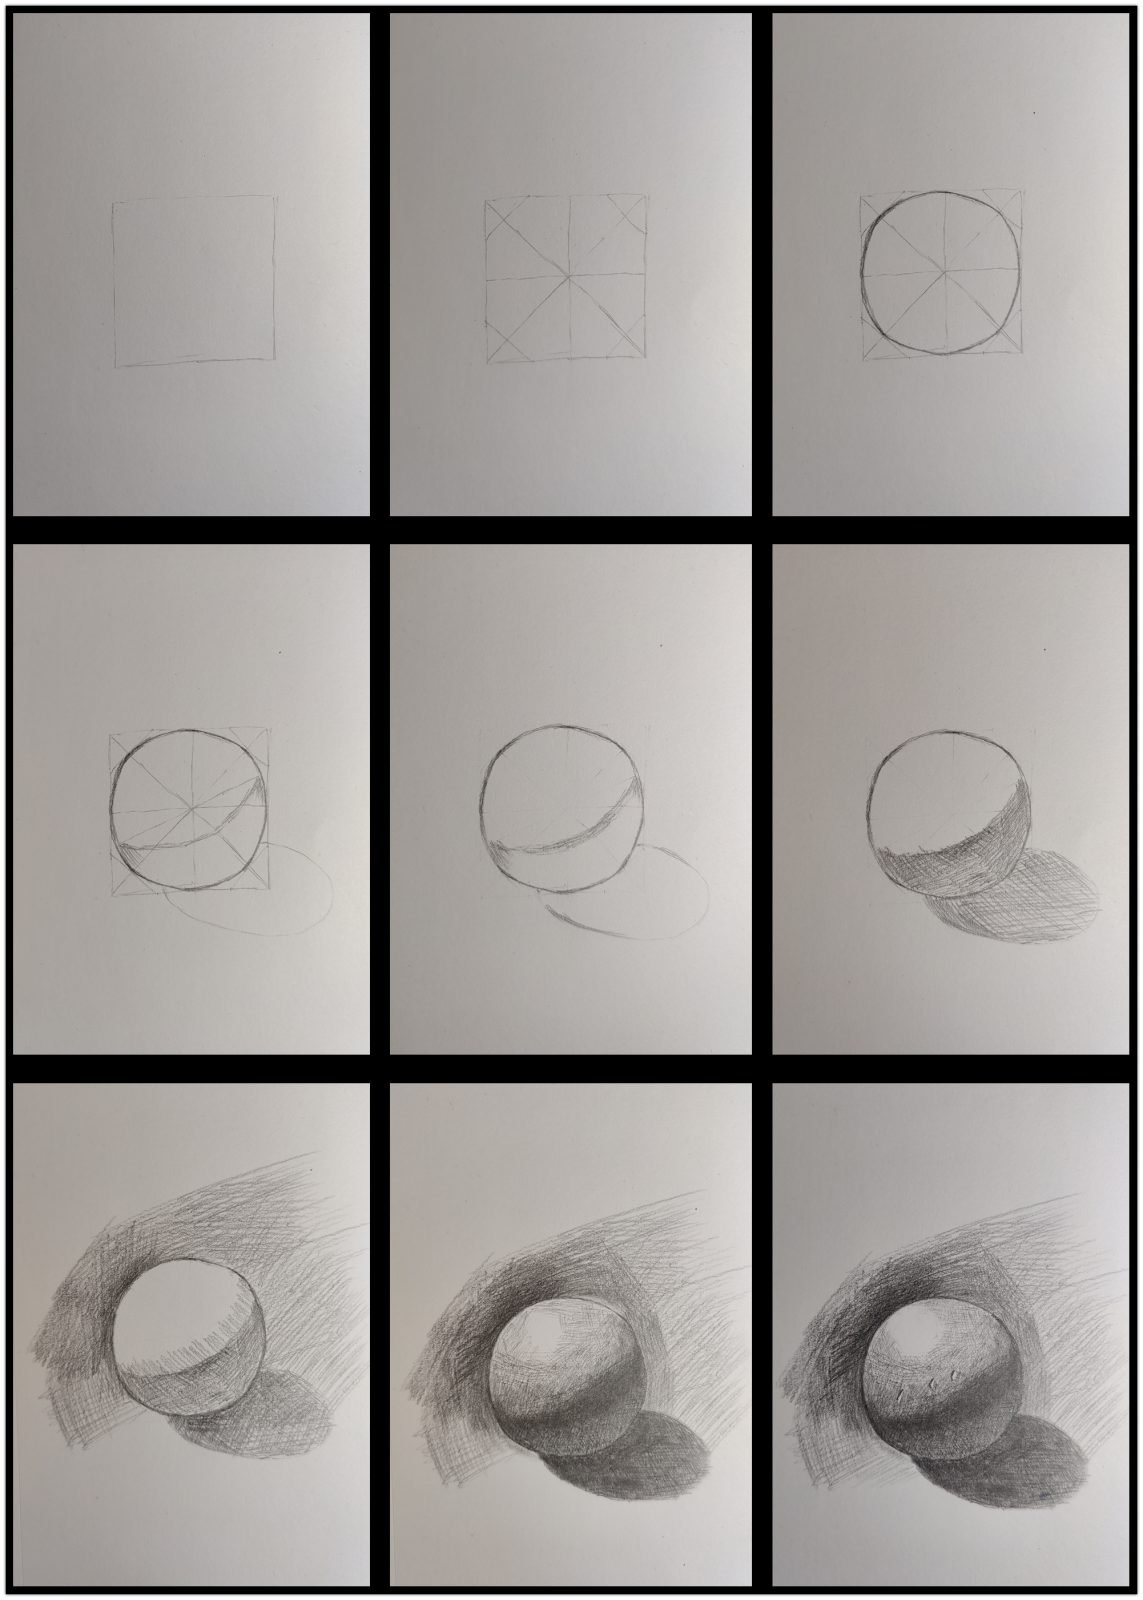
1. Draw a sphere – Draw a circle to start
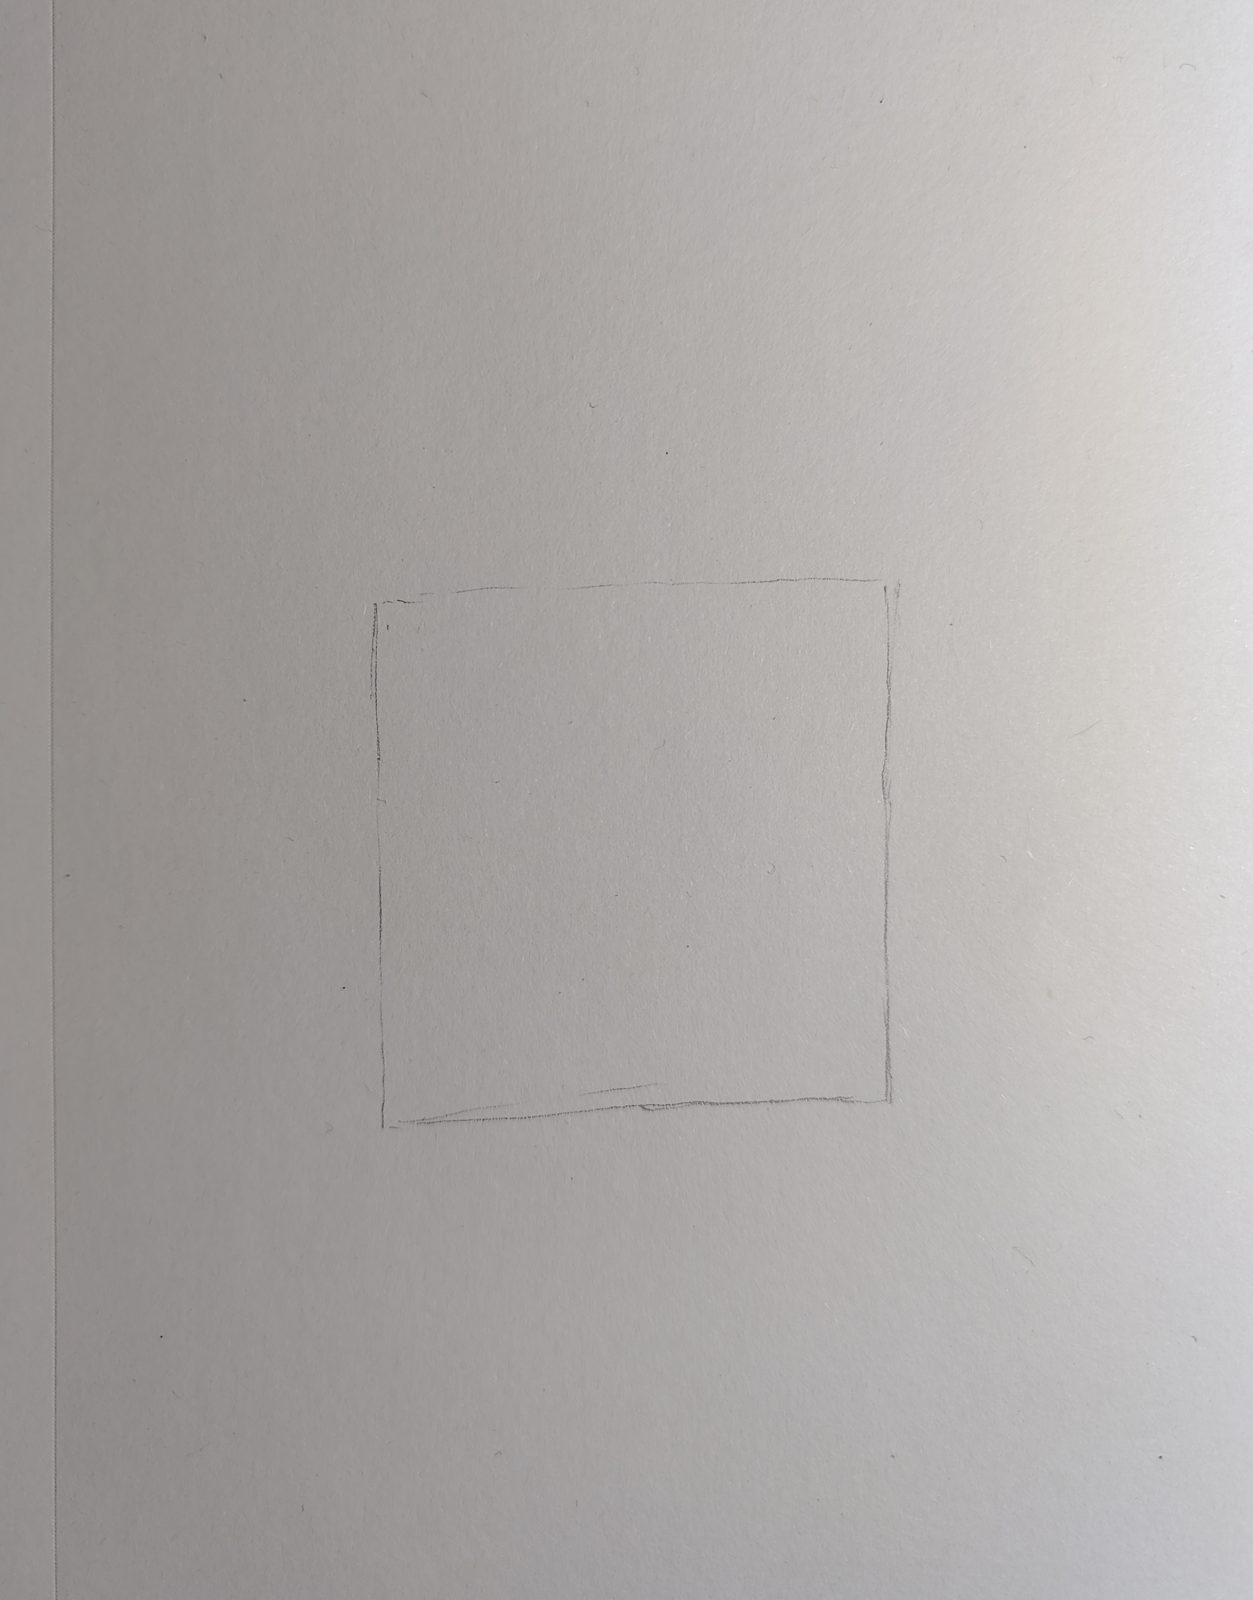
First, we have to draw a circle.
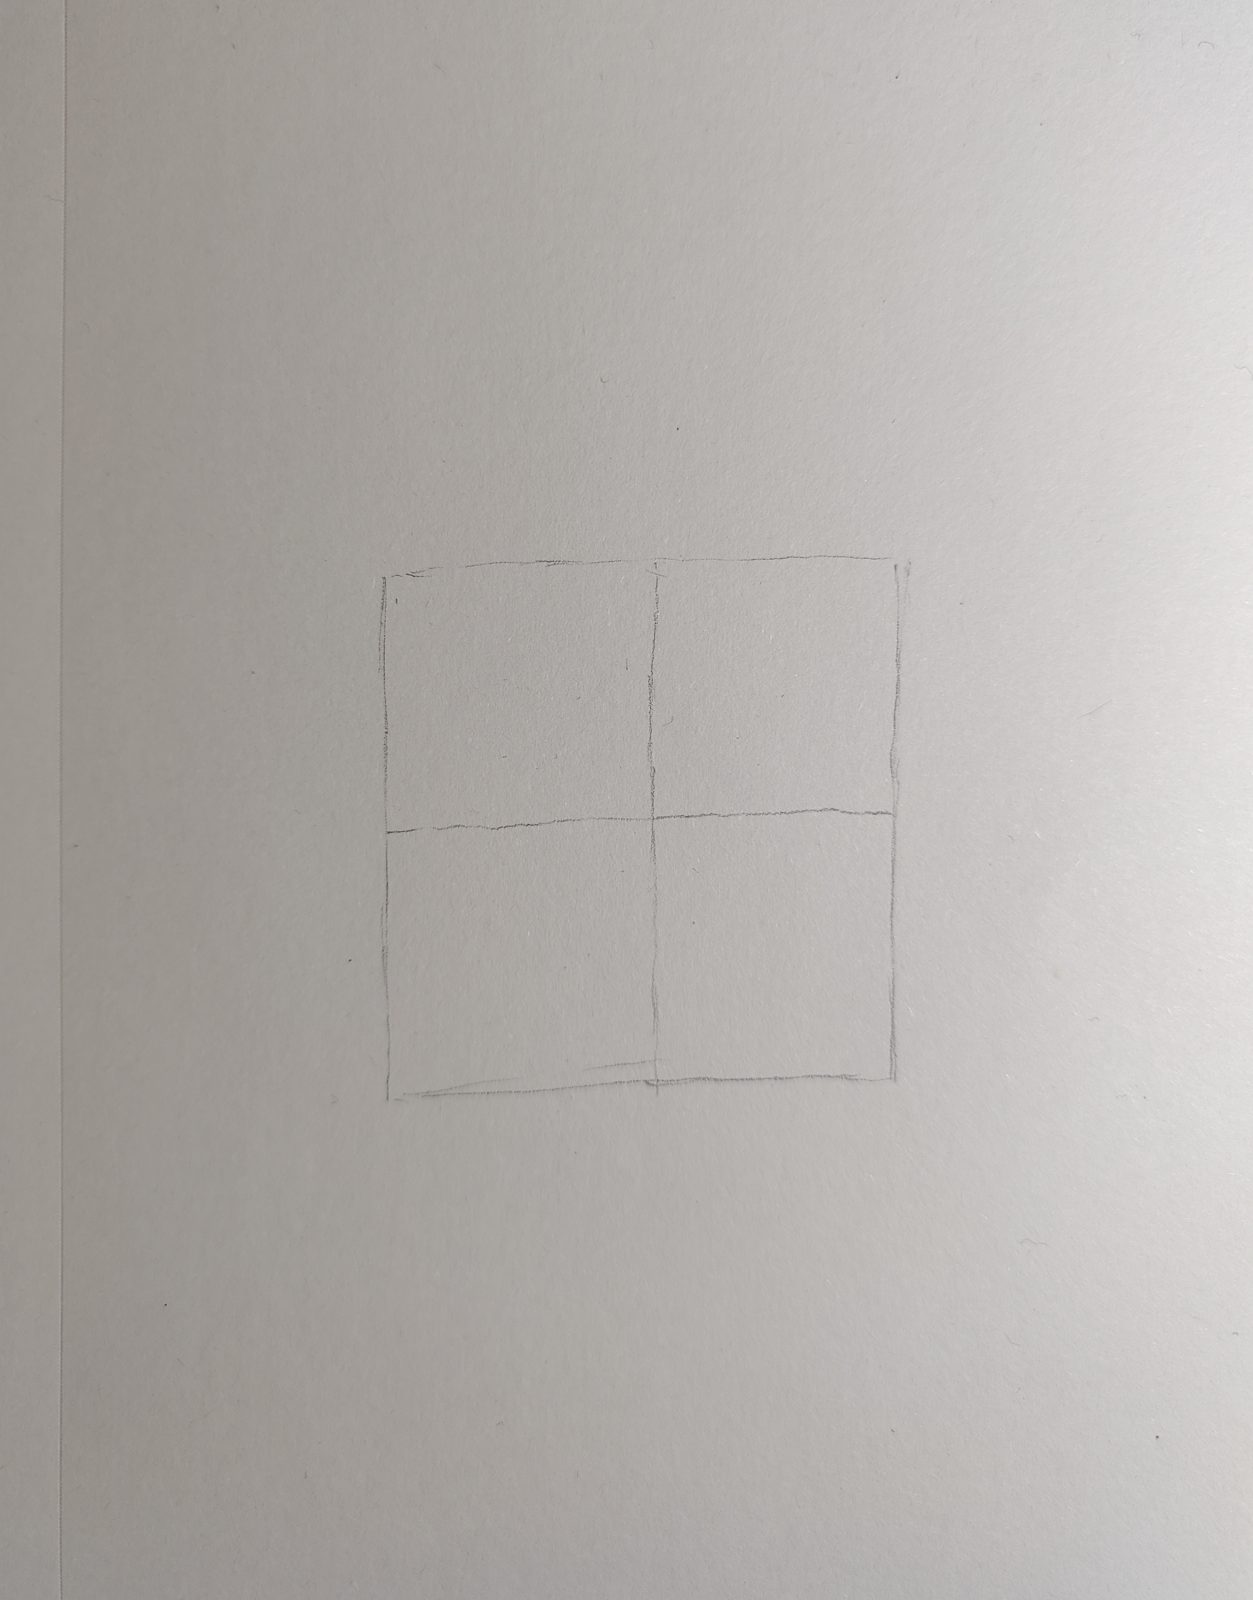
We draw a square to help us draw a standard circle.
The sides of the square you can measure with a pencil and try to be as square as possible.
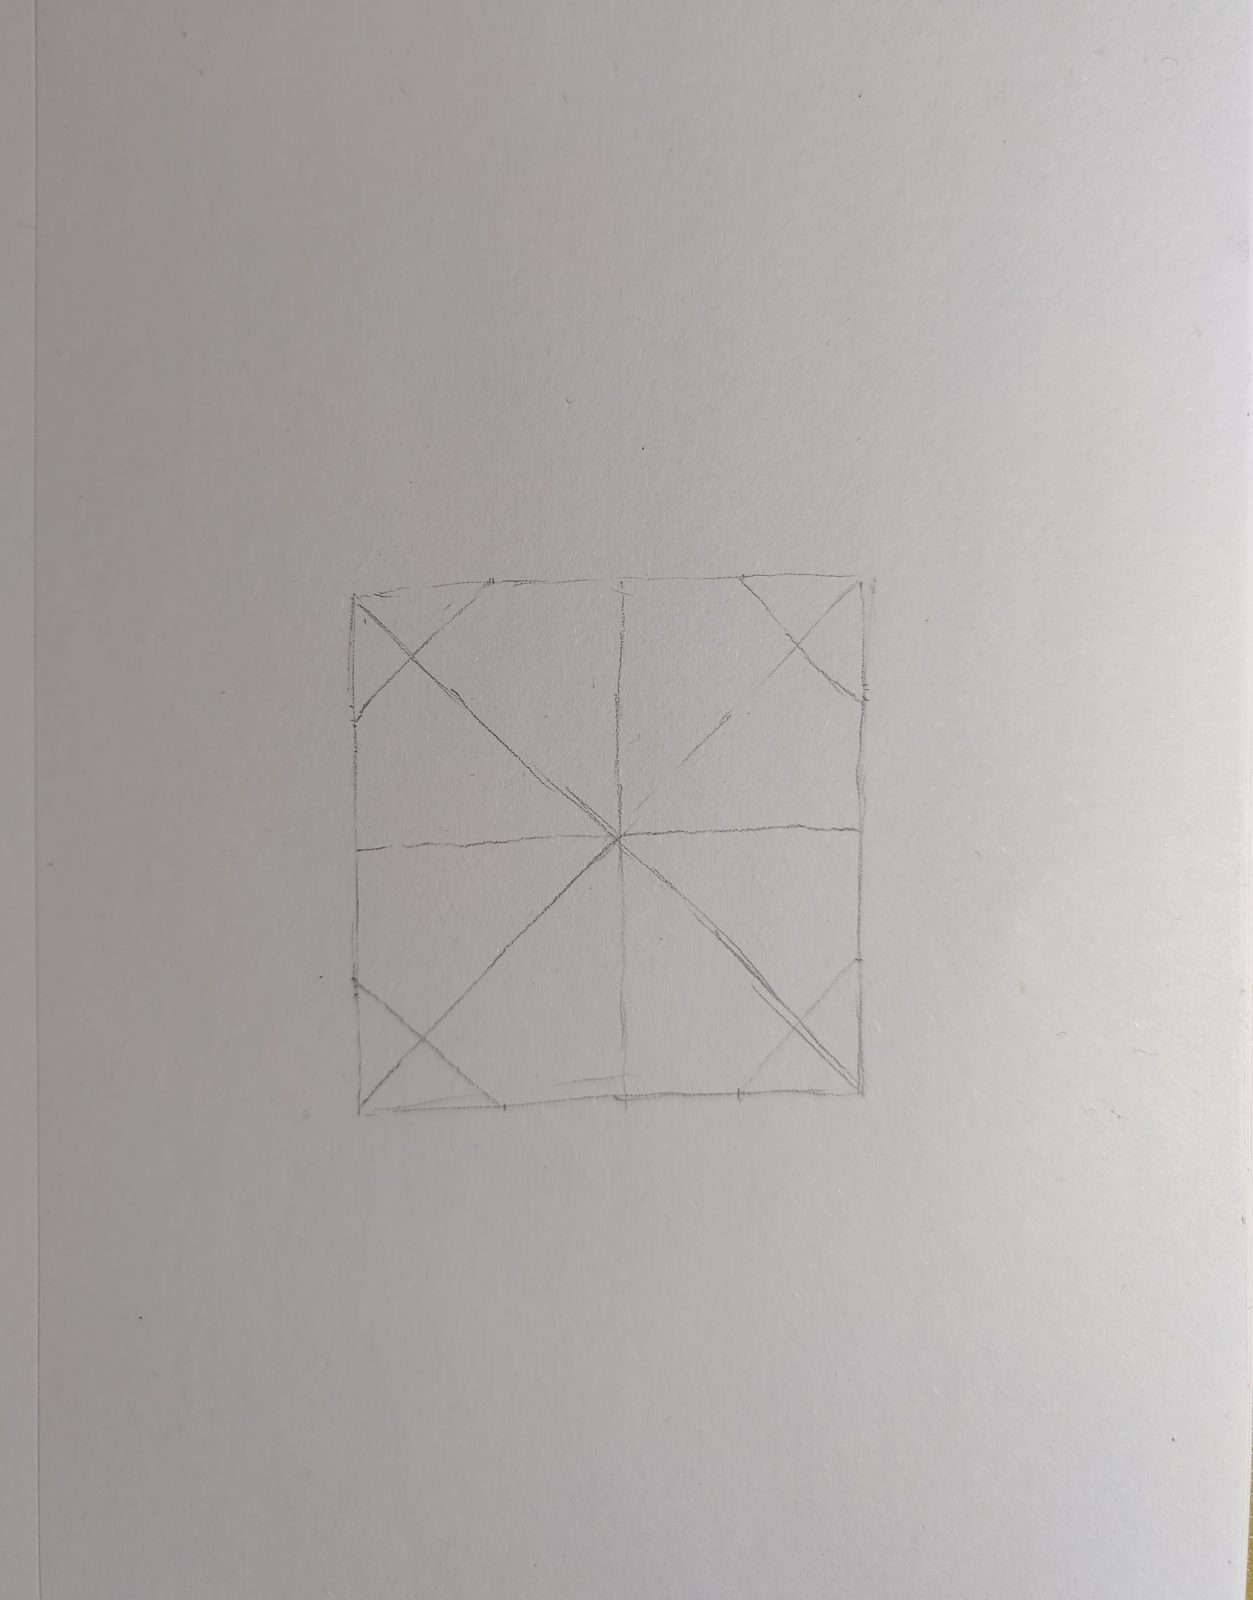
Then draw the diagonal lines and find the center point. Then draw the plumb line and parallel lines through the center.
Follow our steps step by step and you will be able to draw a regular circle.
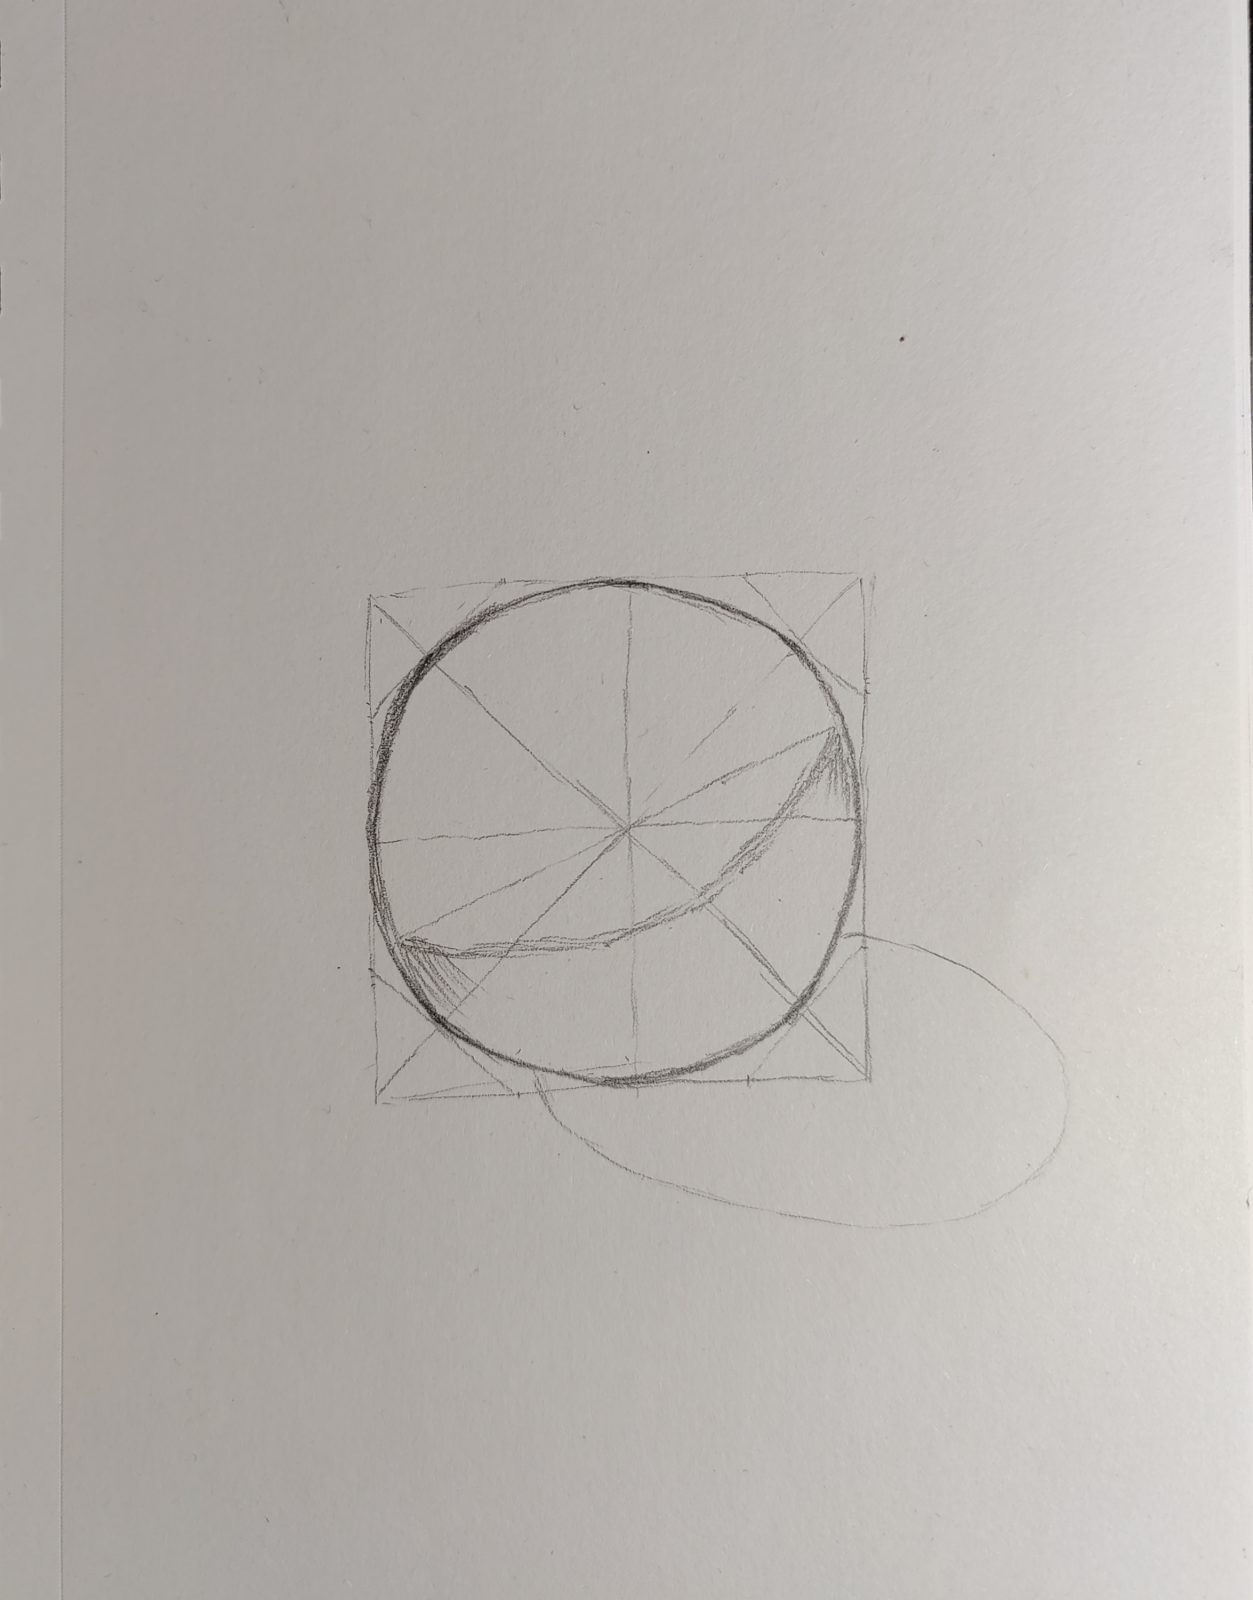
2. Drawing sphere shadows
Next, we draw a tangent through the center of the sphere. This will be the junction line between the light and dark shadows.
Then we draw the approximate outline of the projection.
Now we can erase the auxiliary lines.
Then we draw the initial shading and projection with parallel lines.
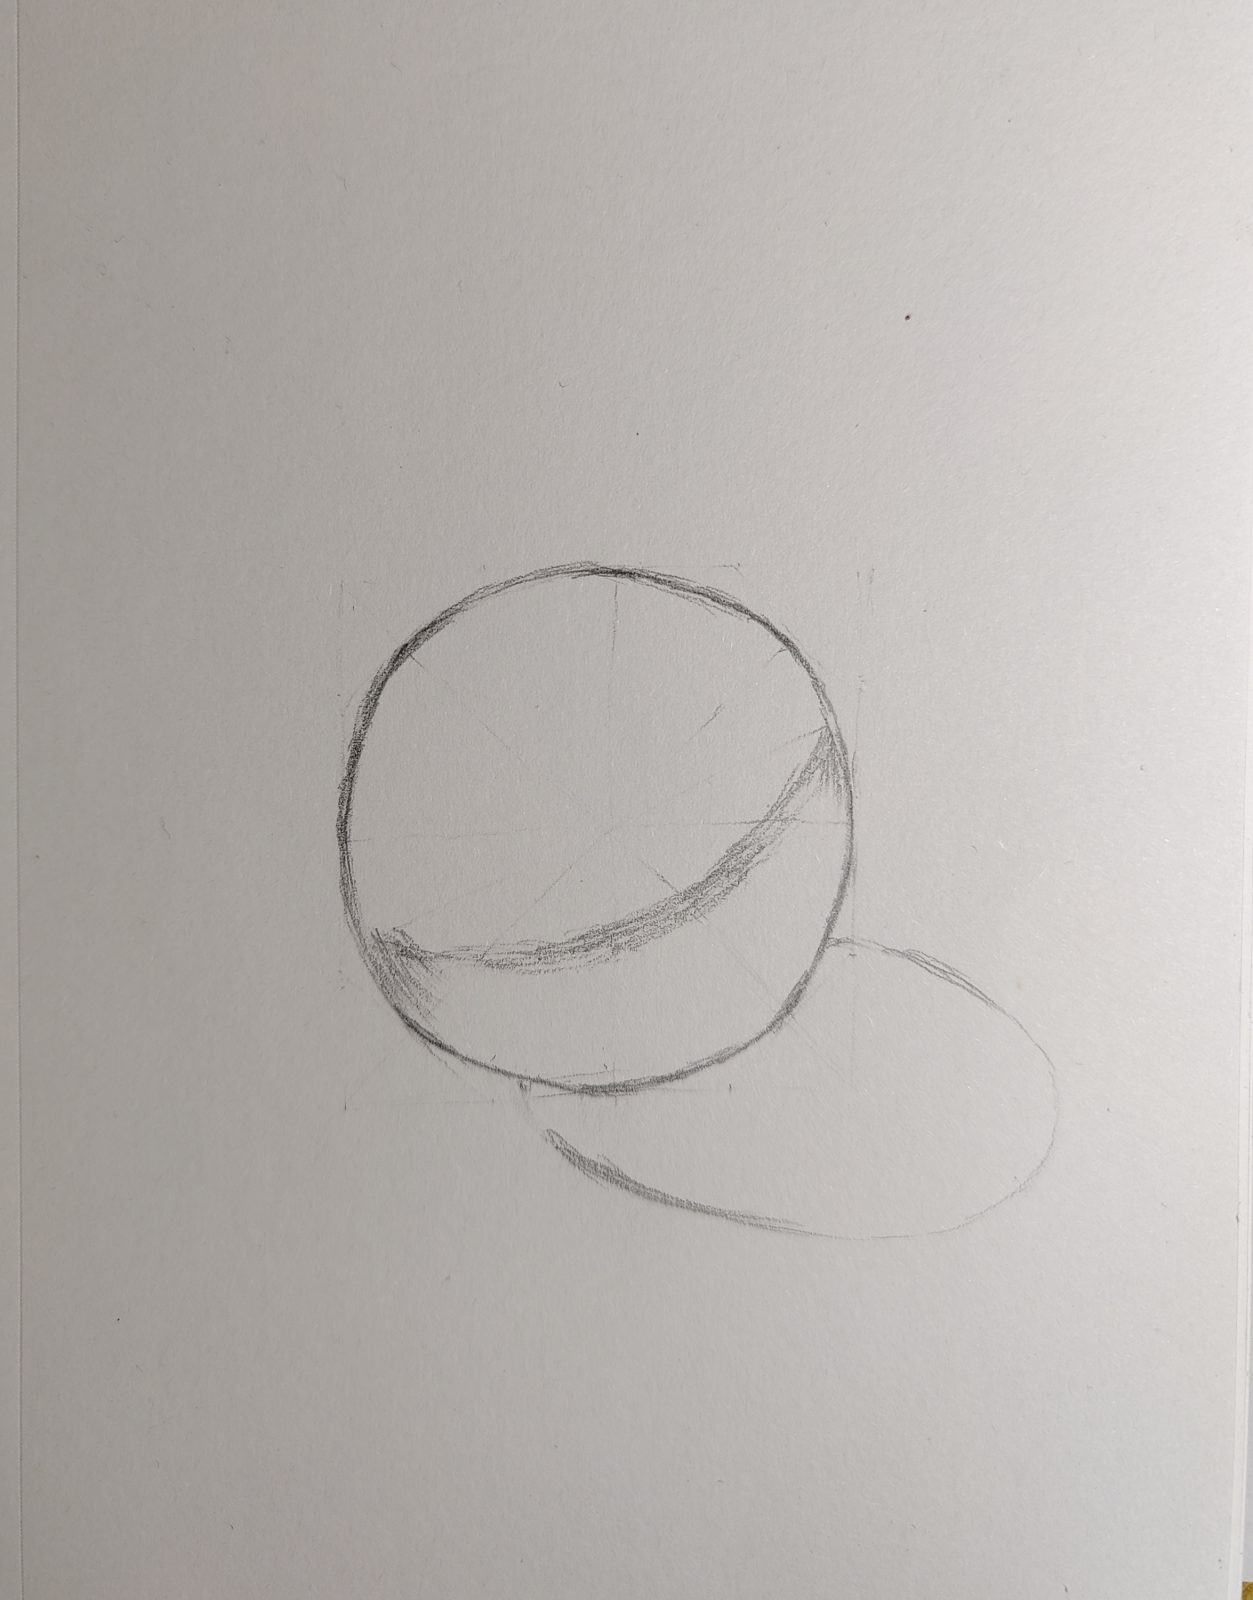
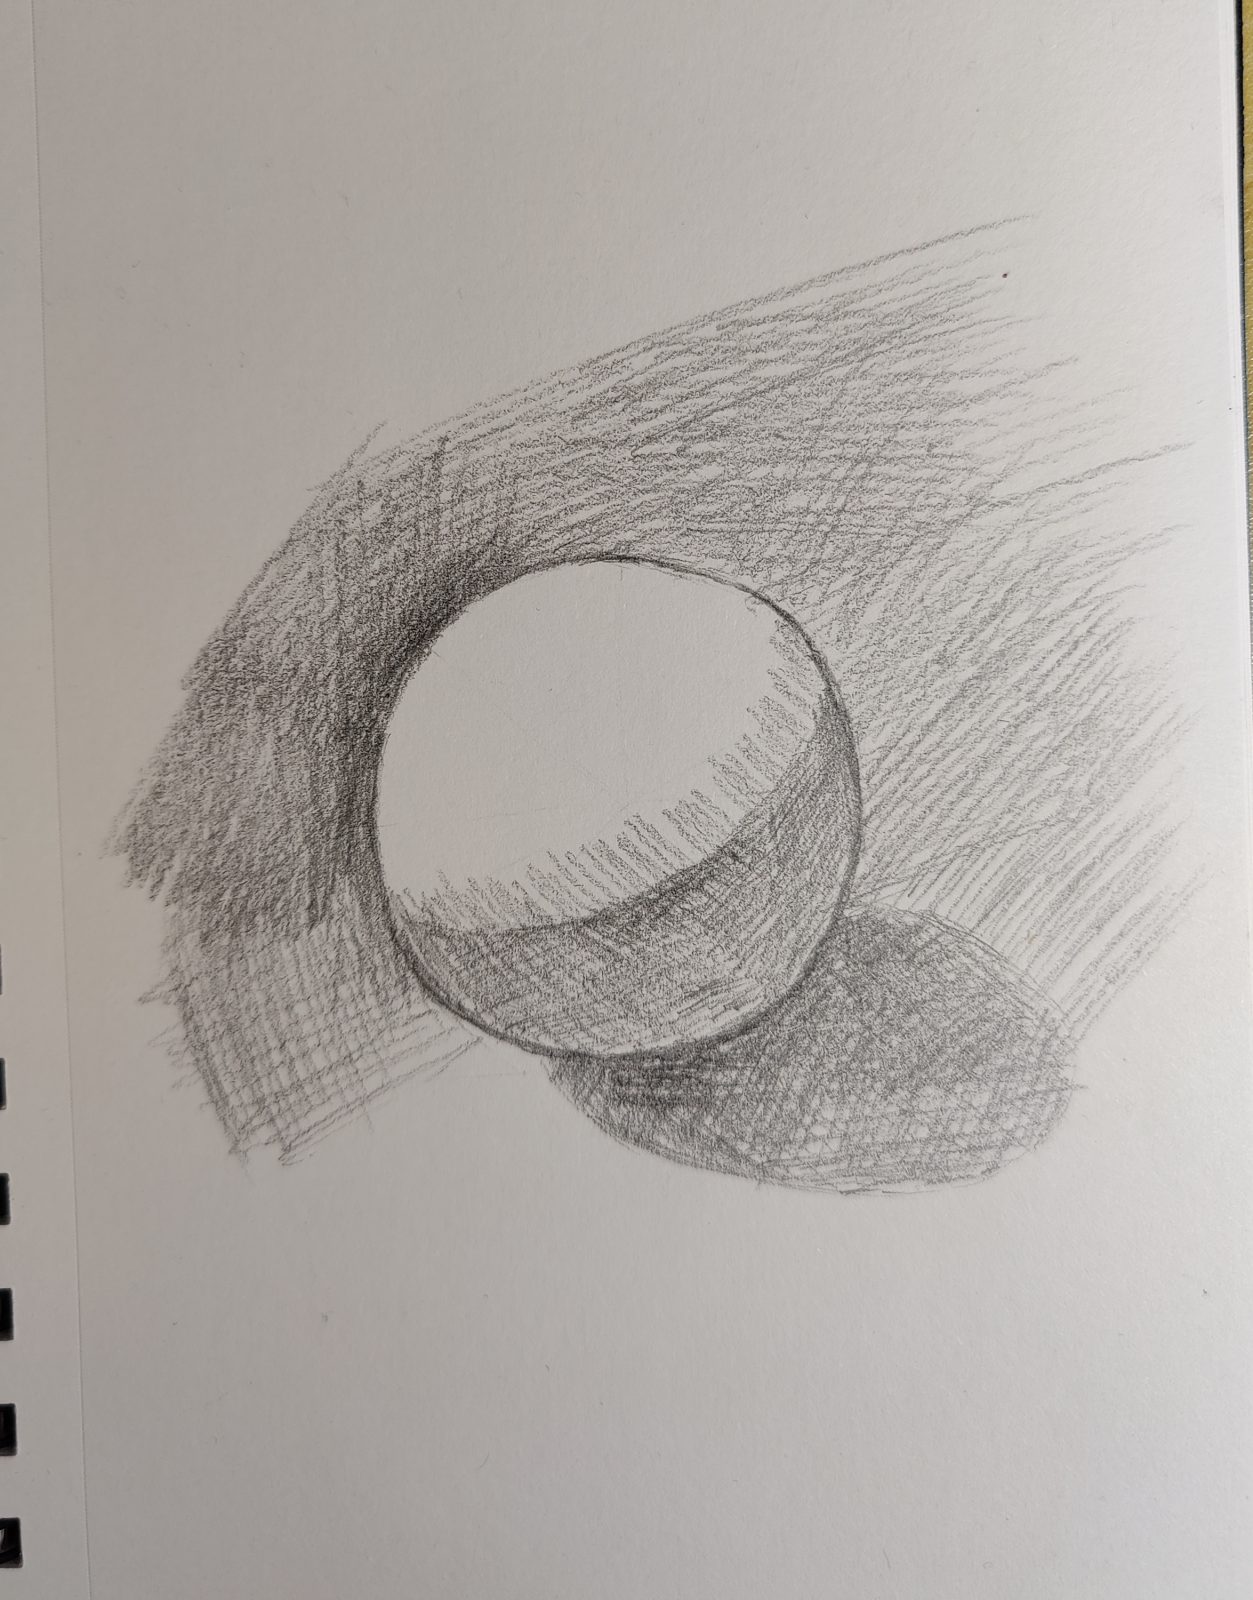
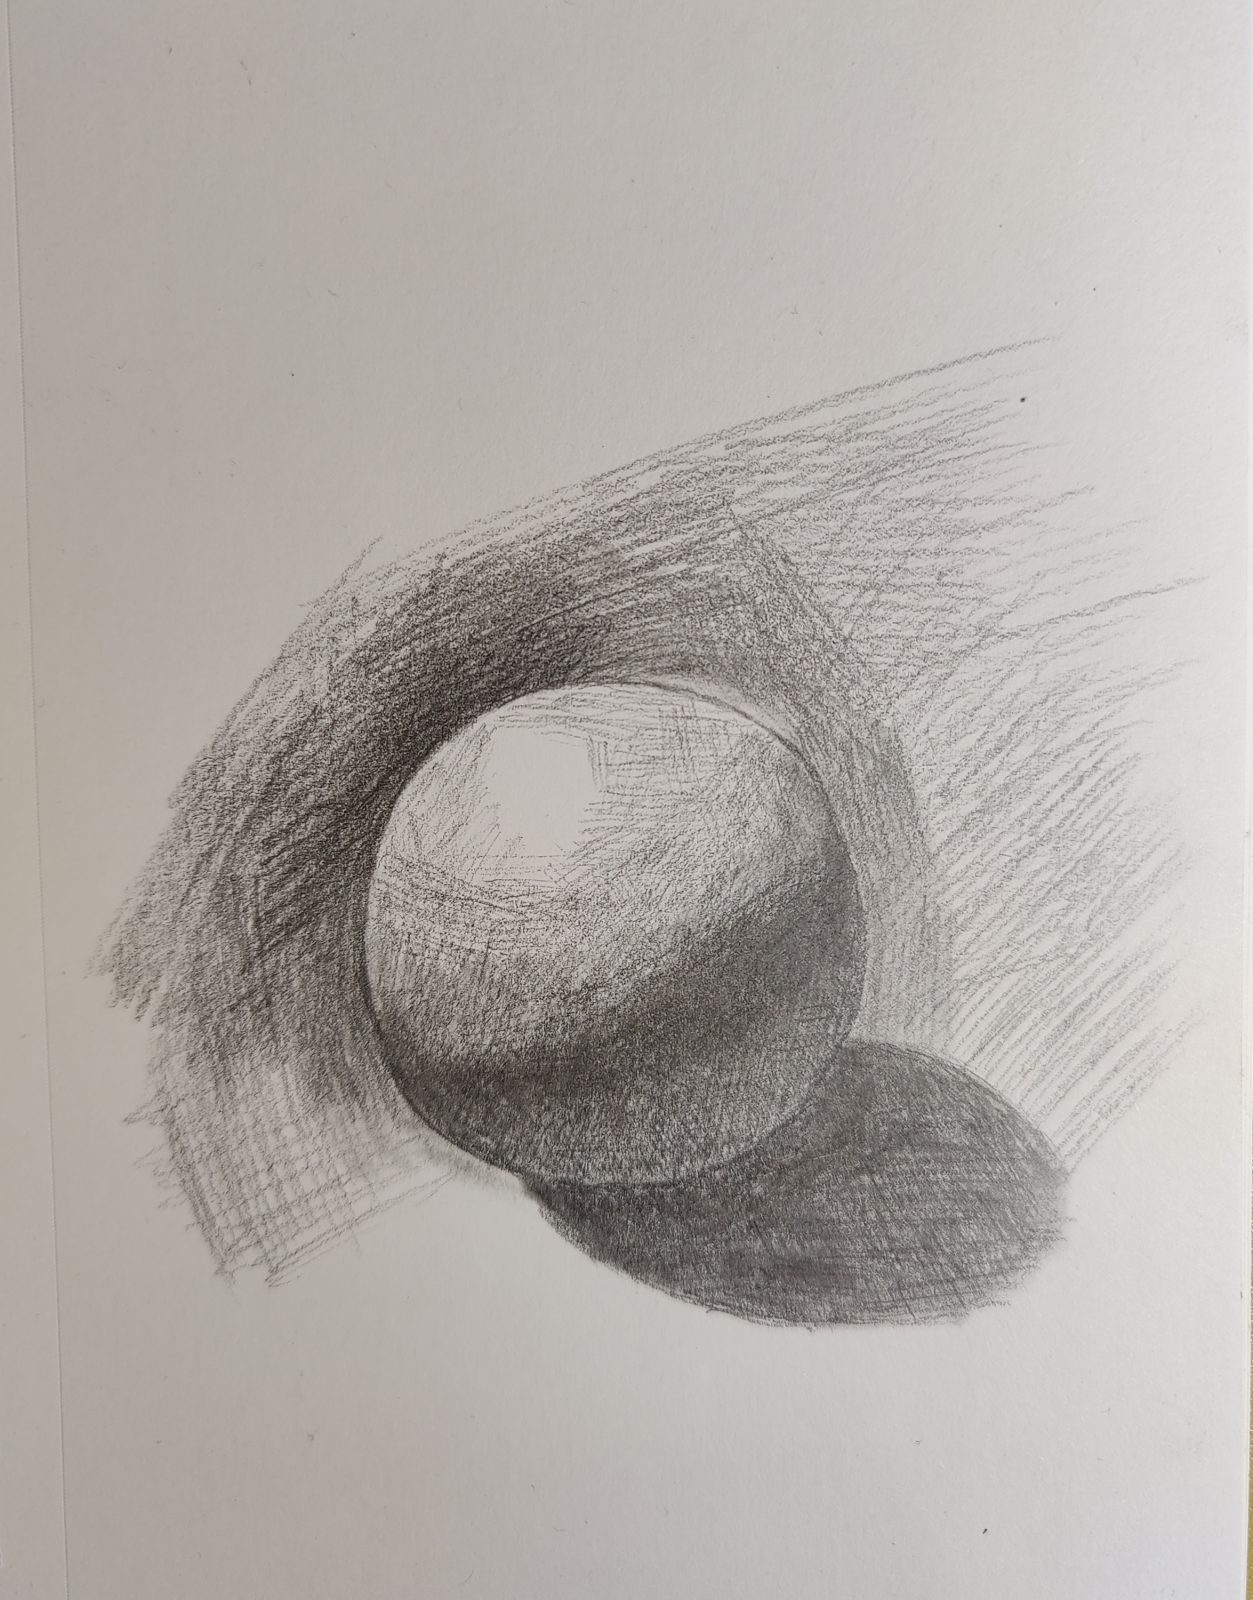
3. Create stronger shadows
Next, we draw the background shadows.
Then strengthen all the shadows. Keep drawing parallel lines with different angles to create the light and dark variations we need.
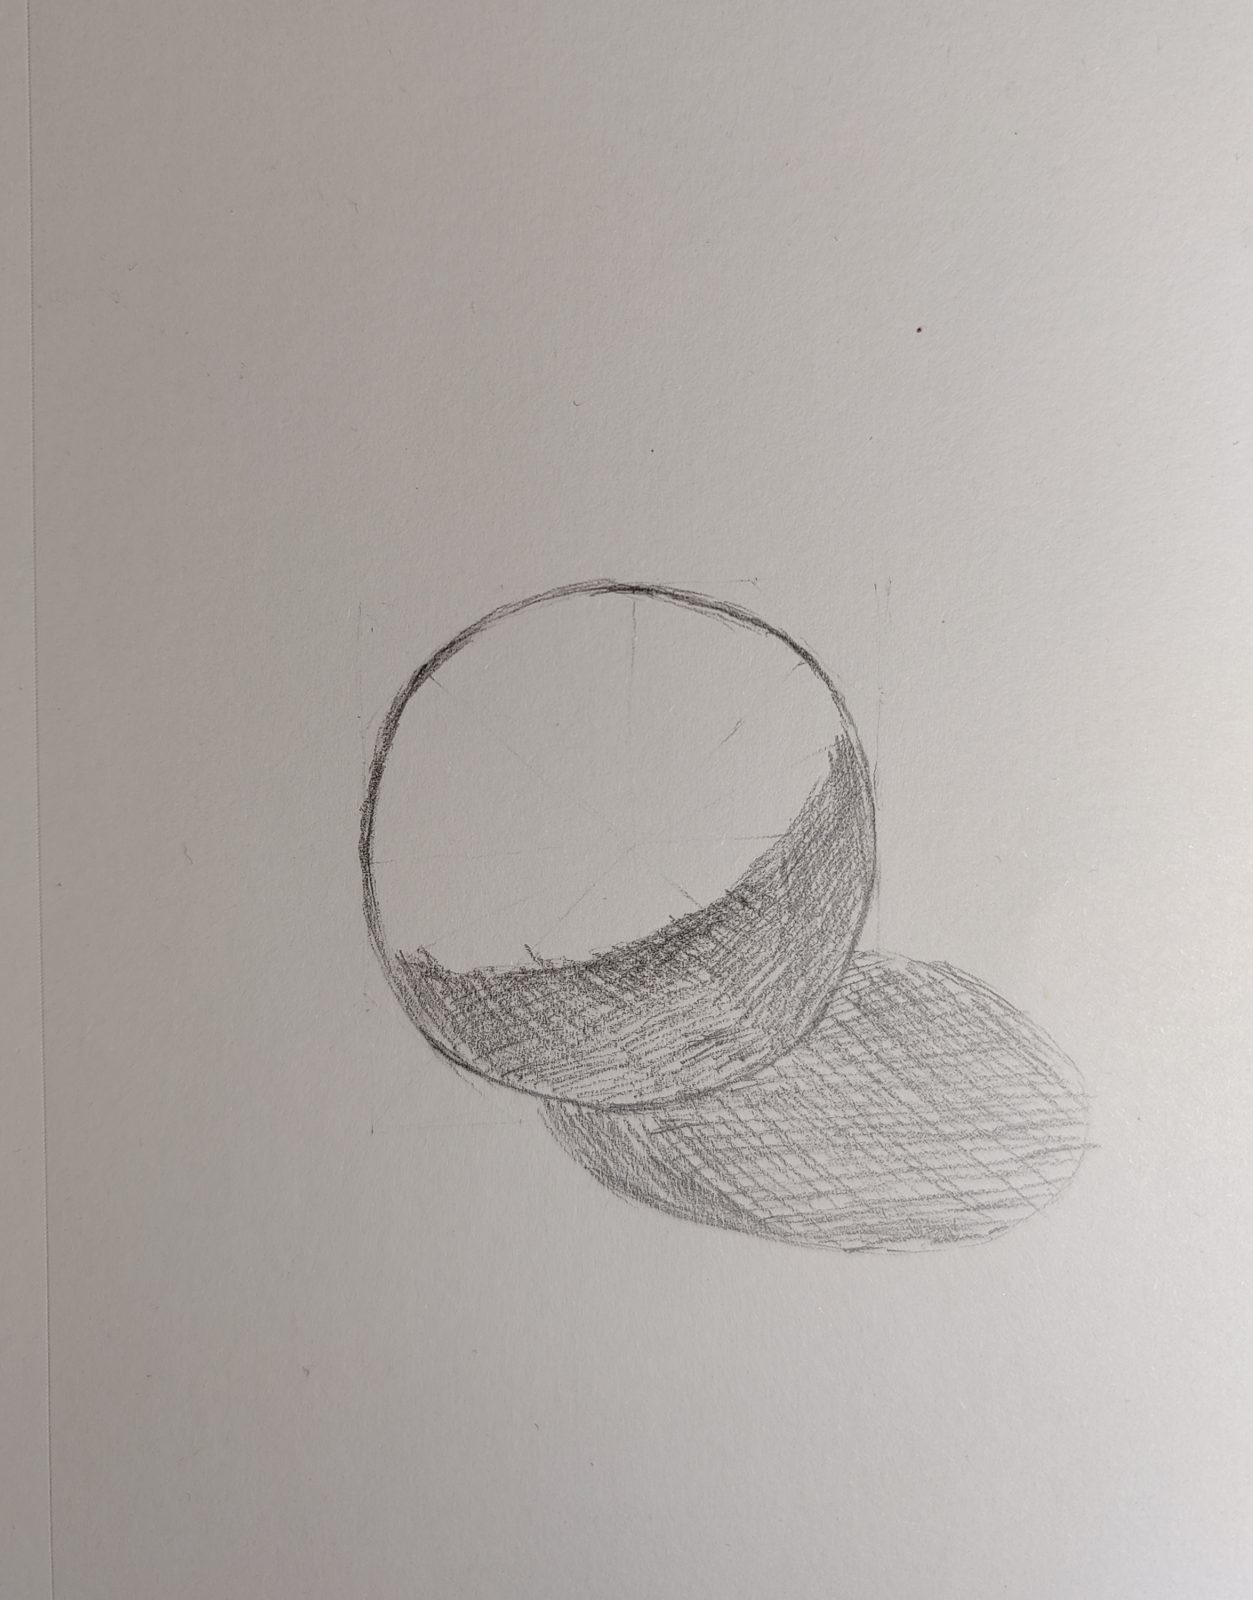
Finally, you can also draw a few small scars on the sphere.
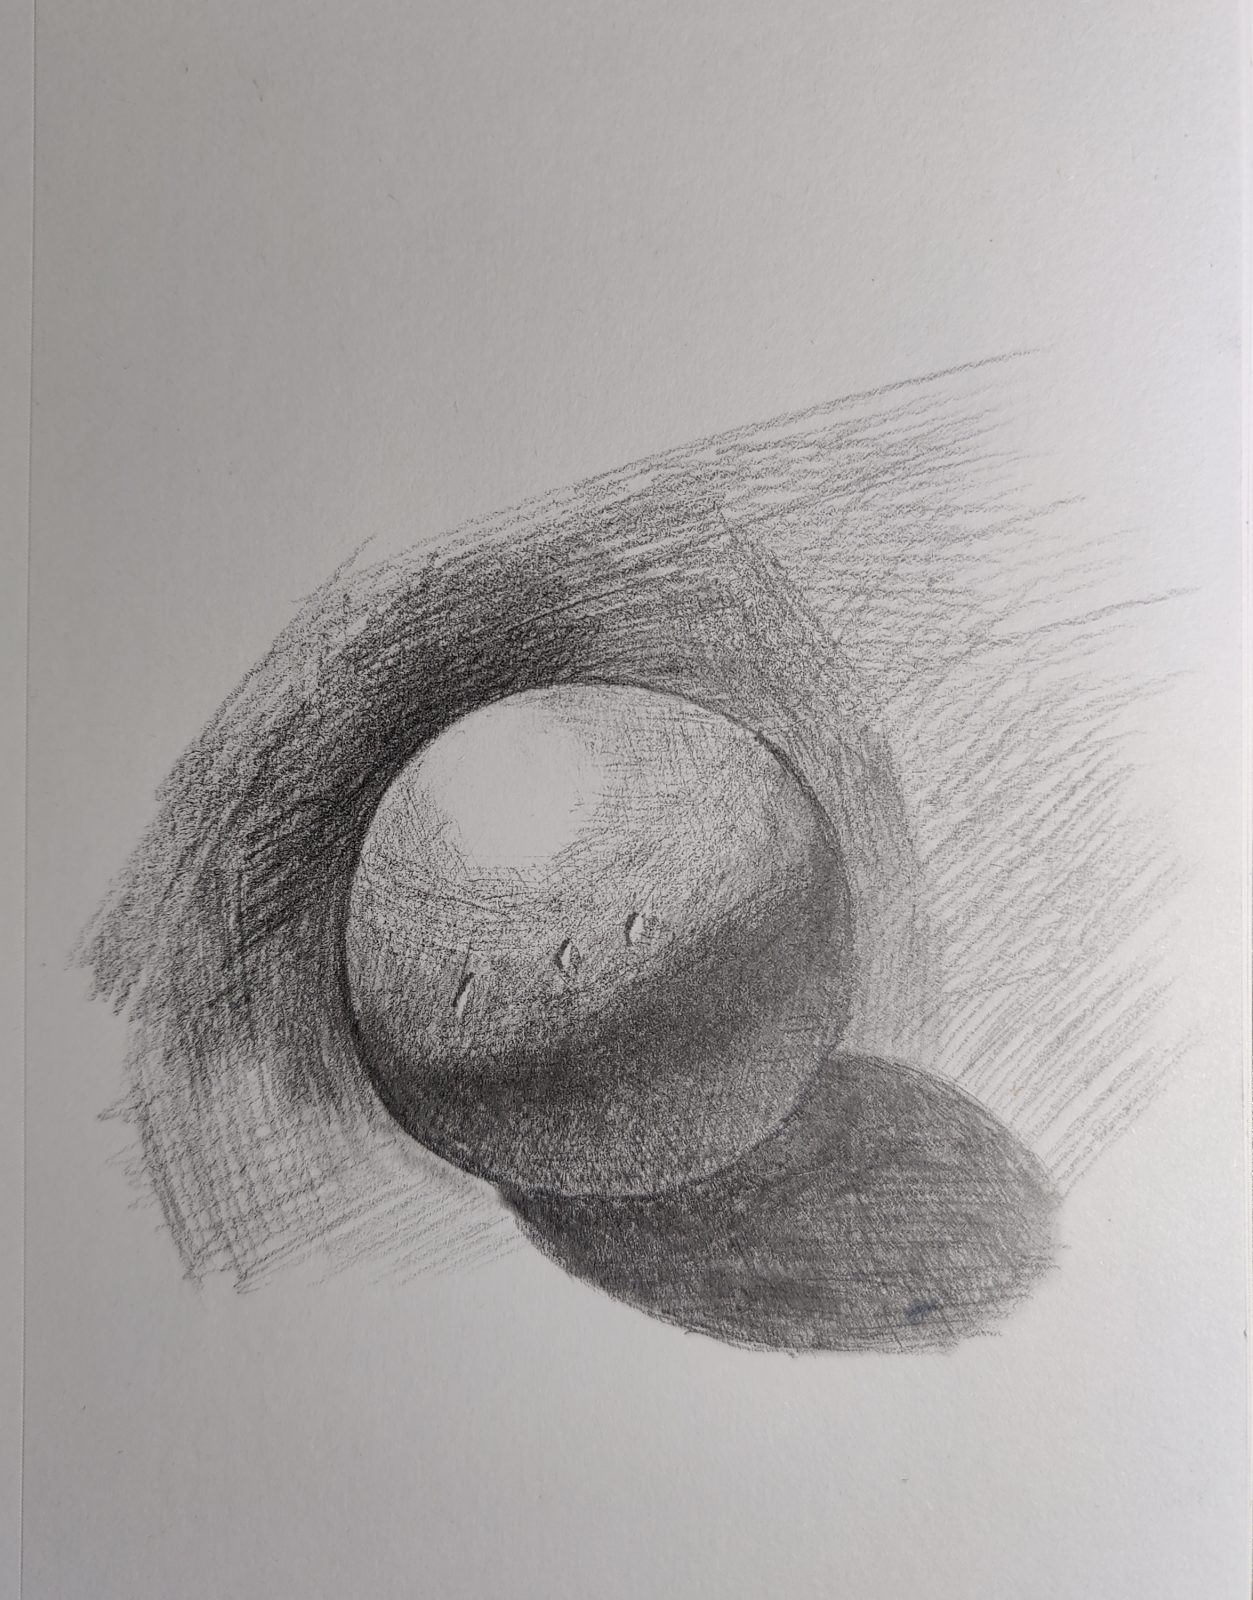
Do you see the change in light and dark when you finally finish the work?
How does your work look? If you want to show it, you can leave us a comment below.