We’ve already shared a tutorial on how to draw a foot before. How did you practice? Today, we’re sharing another technique for drawing feet.
We’ll have three step-by-step ideas for drawing feet such as front view, back view, and tiptoe. This is still a really easy tutorial for facing beginners.
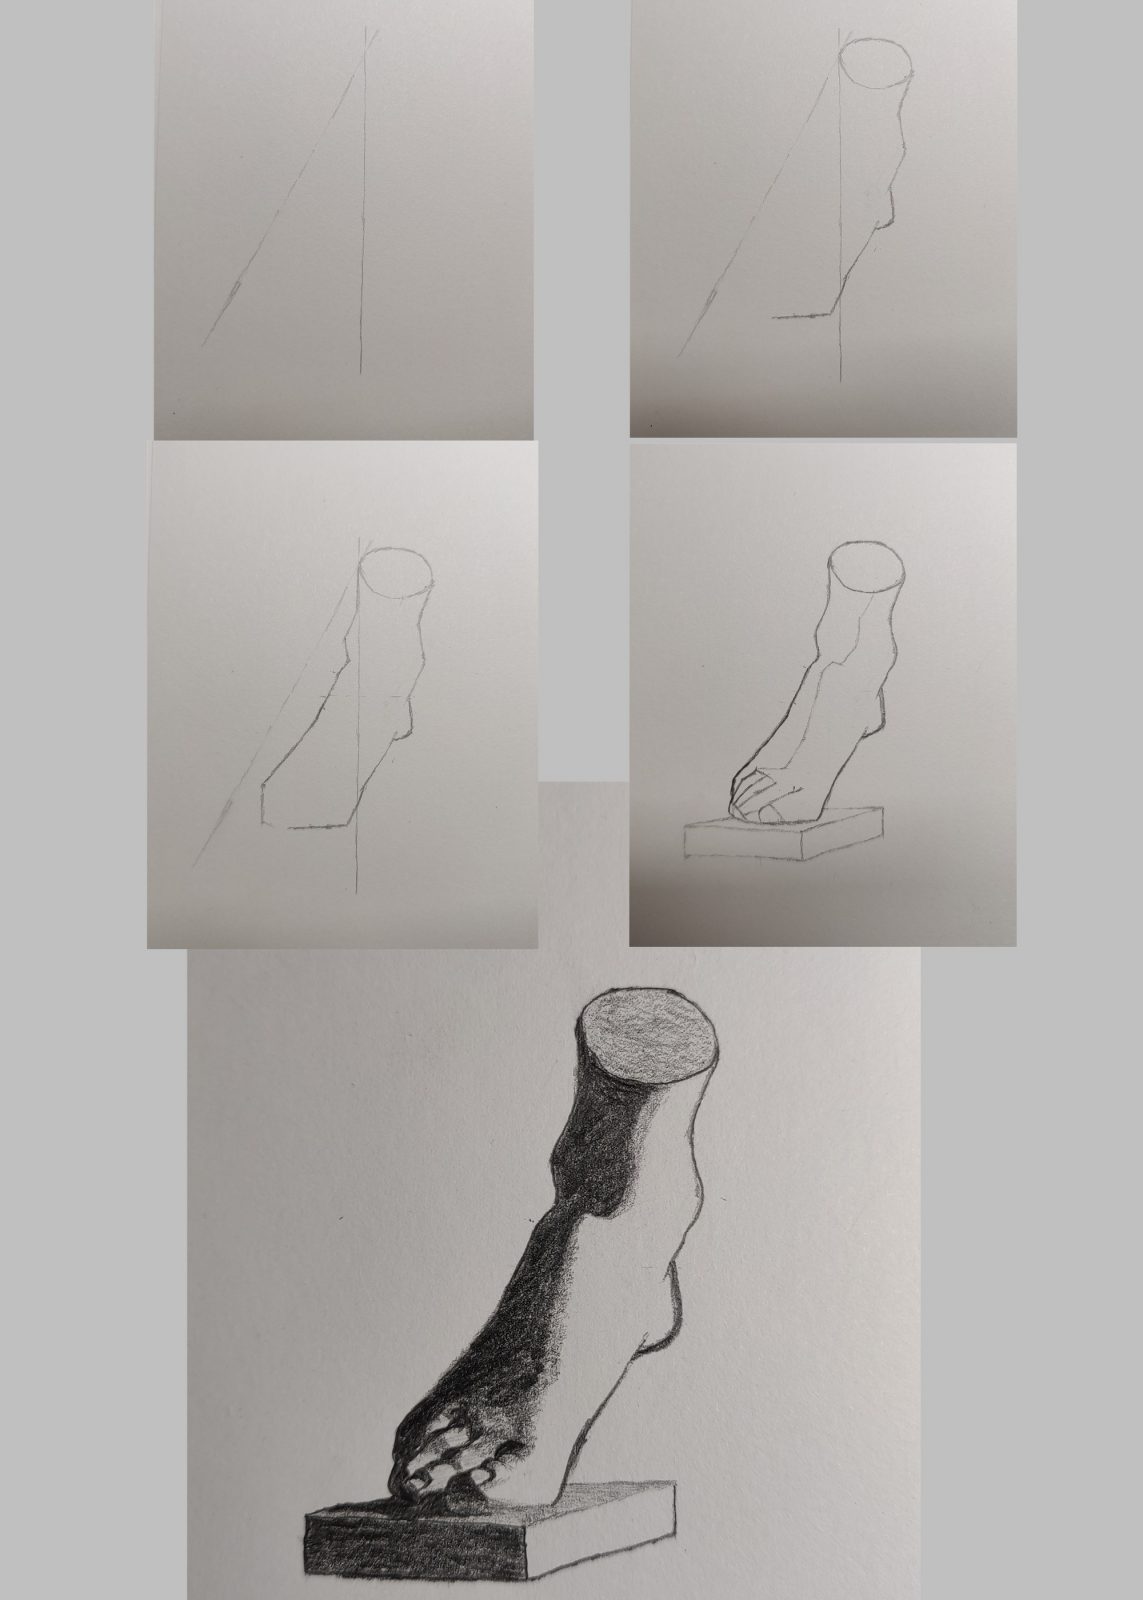
1.Draw a foot – prepare the auxiliary line
First, we draw two auxiliary lines in reference to the original book. Note that one is perpendicular, one is slanted, and the intersection angle is about 30 degrees.
Next, we draw an ellipse at the point of intersection. This is a cross-section of the calf.
Then, based on the ellipse, we roughly determine the position of the big toe.
Notice that we first draw the tiptoe piece.
Once we have determined the position of the big toe to scale, we begin to draw the inner ankle contour.
Then the somewhat rounded heel, the arch, the big toe
(source: Drawing Course)
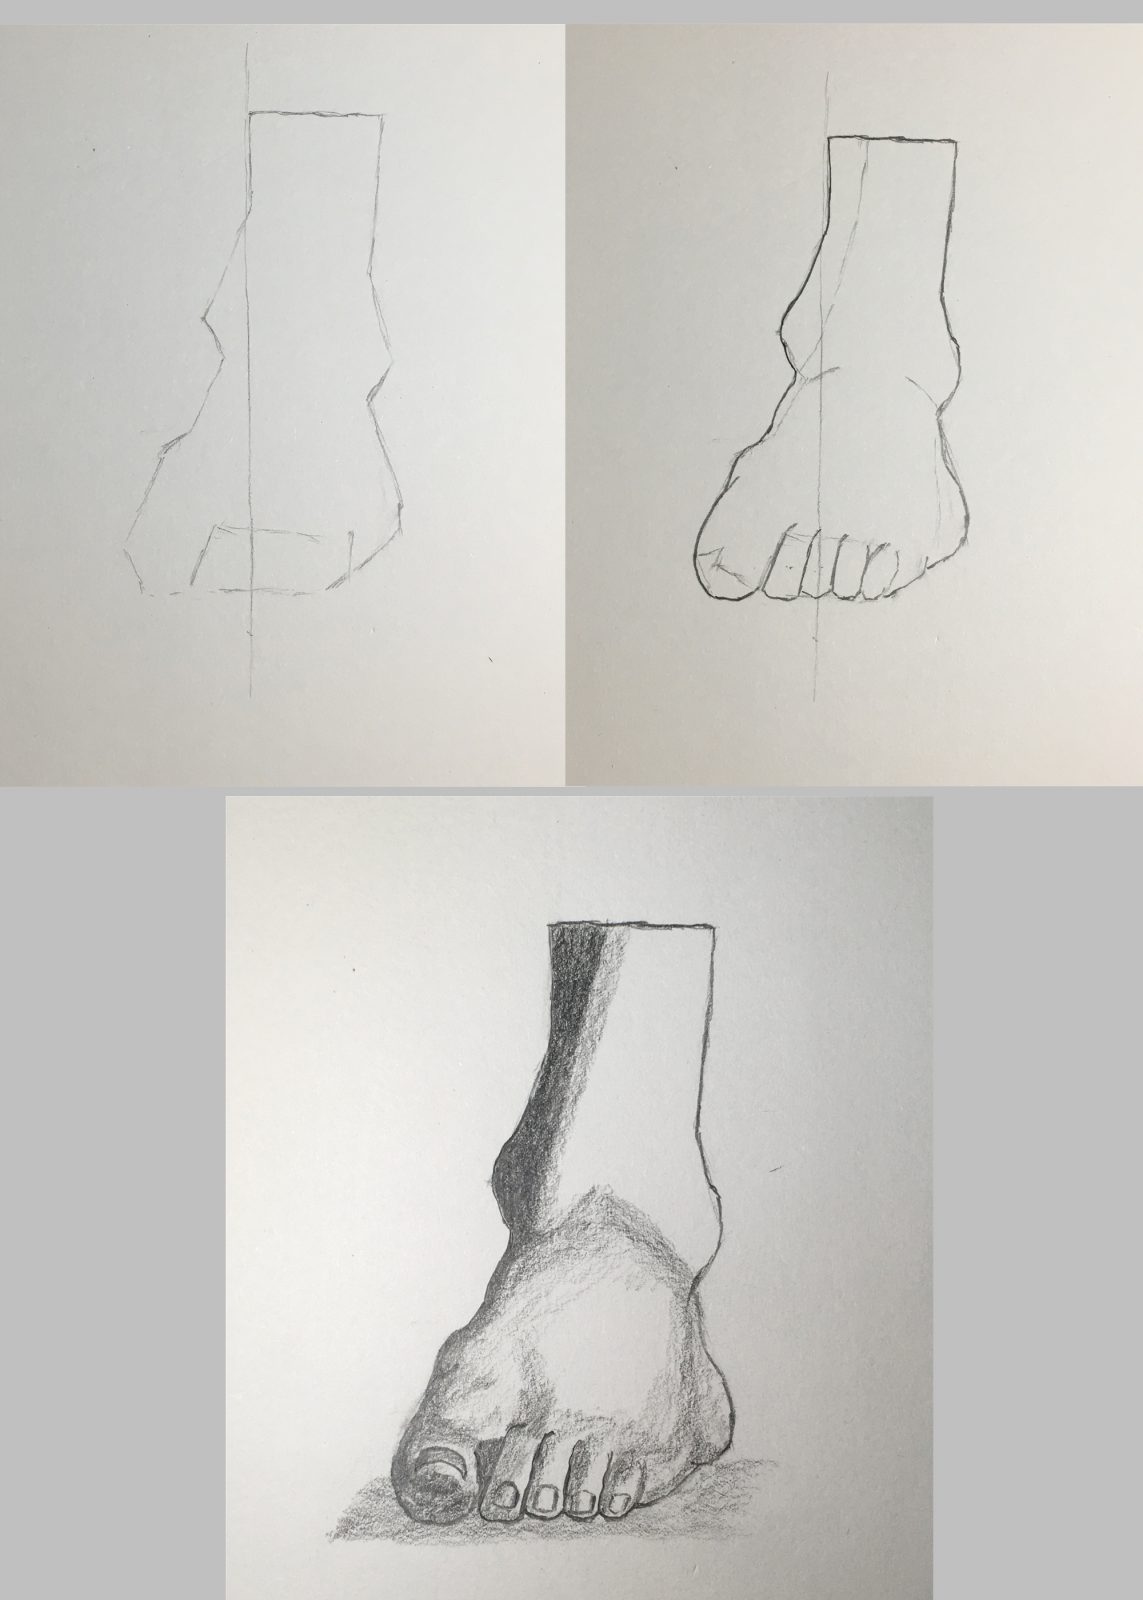
2. Sketch of the outer ankle and toe
Next, we begin drawing the outer ankle. Notice that the outer ankle is slightly higher.
Then finish drawing the outer line of the foot. We’ll start drawing the simple contour of the toes.
Finally, draw the light and dark junction lines.
We erase the auxiliary lines, and here we have our work almost in shape.
3. Draw a Foot – Shadow
First we need to draw the contours of the feet to make them sleek and graceful.
Finally, let’s start drawing shadows and light and dark excesses.
Referring to the original tutorial, we keep modifying it in the hope that it will be a perfect copy of the original.
Are you done with your shadows? Is it also possible to complete a painting that surprises you.
Leave us a comment below if you have any ideas.
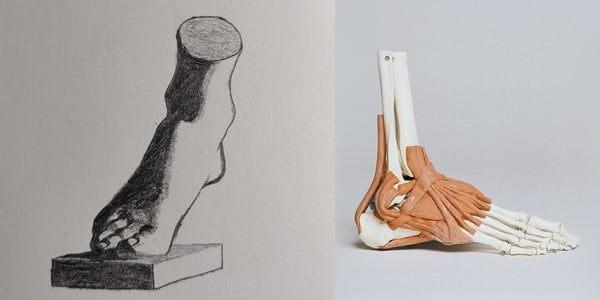
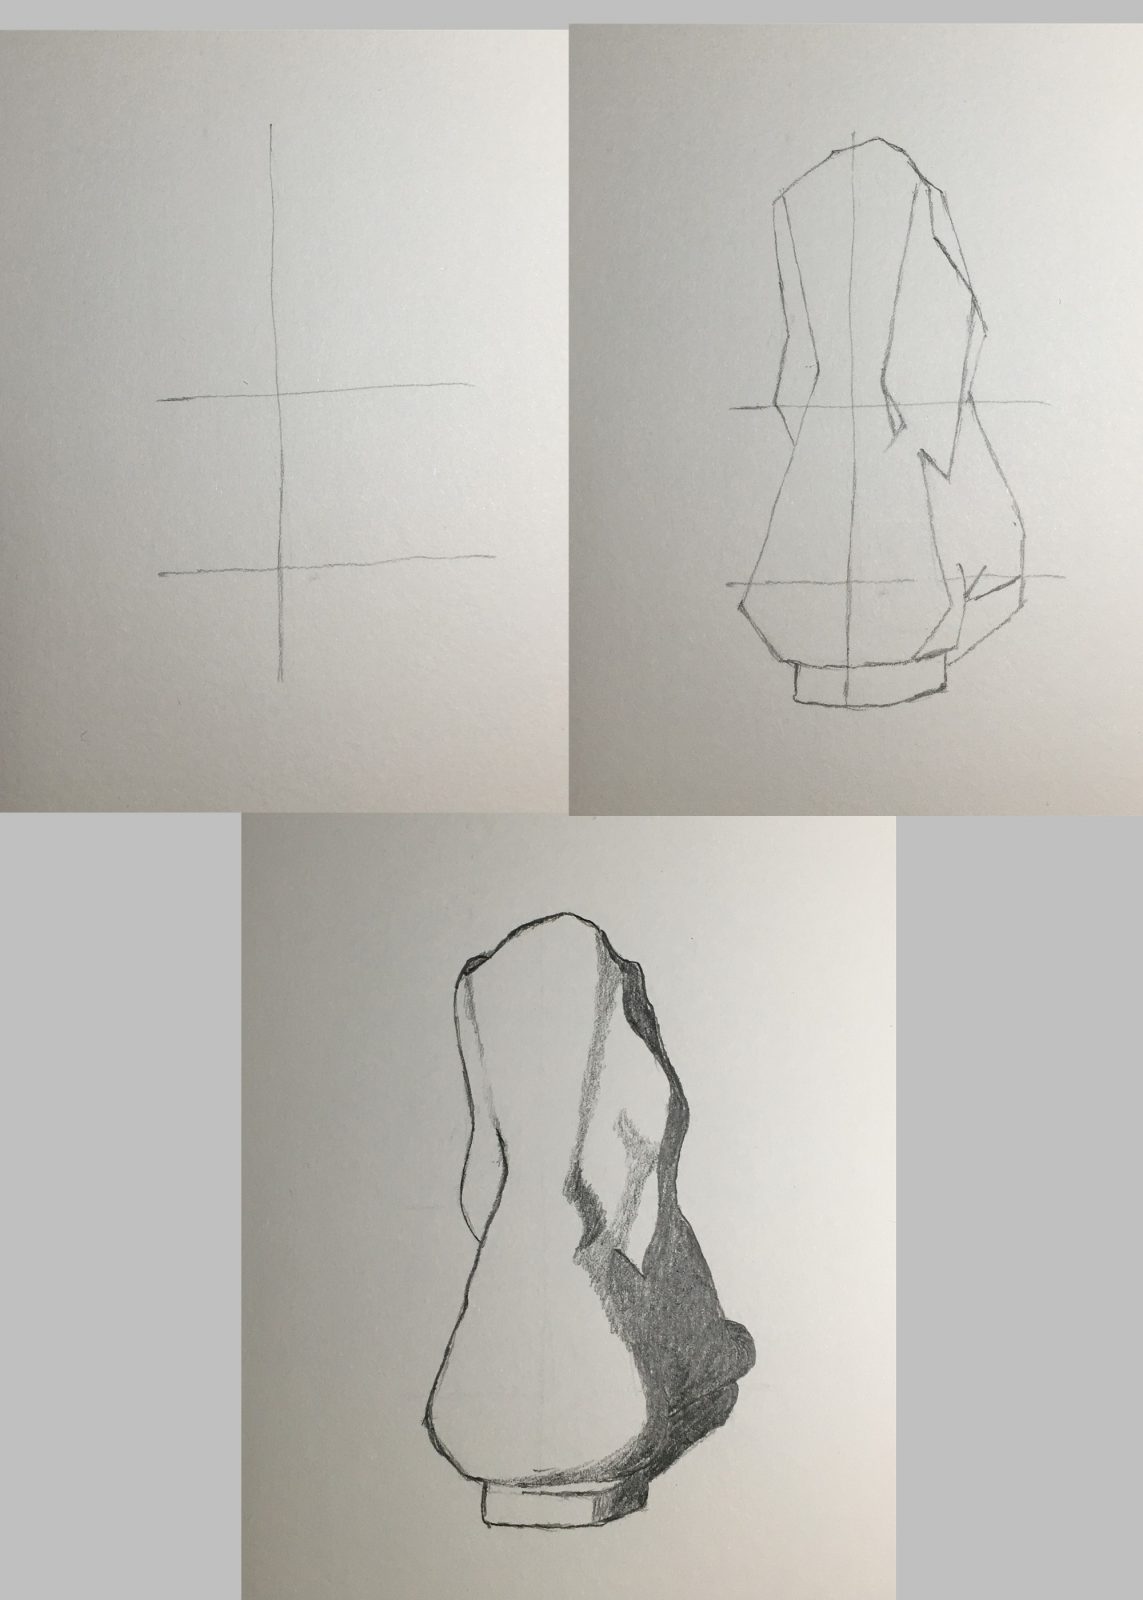
4.Drawing feet in the rear view
This is a step-by-step tutorial for practicing drawing feet in the rear view.
5.Learn to draw feet – front view
If you’re still highly interested, you can also draw this orthographic view.